


Summer is here and gives you the mood for cheerful nail designs in refreshing pastel colours! I've tested how to create the perfect manicure with essie. With the following steps you can enjoy beautiful summer nails.
Preparation
In order for the nail polish to last optimally, it is important to prepare the nails well. This will make your manicure look much more perfect and you can enjoy it longer.
Step 1: Remove cuticles
Gently push back your cuticle with a rosewood stick. If you have a lot of excess cuticle, you can also remove it with nail scissors. But be very careful not to hurt yourself.
Step 2: File and buff the nails
File your nails into your desired shape and then buff them. A buffer is a very fine nail file. Use it to matt your nails. This helps the polish to stay on better.
Step 3: Clean nails
Clean your nails with alcohol pads or nail polish remover to remove grease and oil.
Painting
Now your nails are perfectly prepared and you can start painting. There are no limits to your creativity.
Step 4: Nail hardener
A nail hardener gives your nails support and makes them stronger. This way you can prevent cracked and broken nails. Nail hardeners with ingredients like calcium, keratin or biotin strengthen brittle nails and promote growth.
Step 5: Base coat
Apply a base coat and wait about 2 minutes for it to dry completely. A base coat protects the nail from discolouration and prolongs the durability of the colour lacquer.

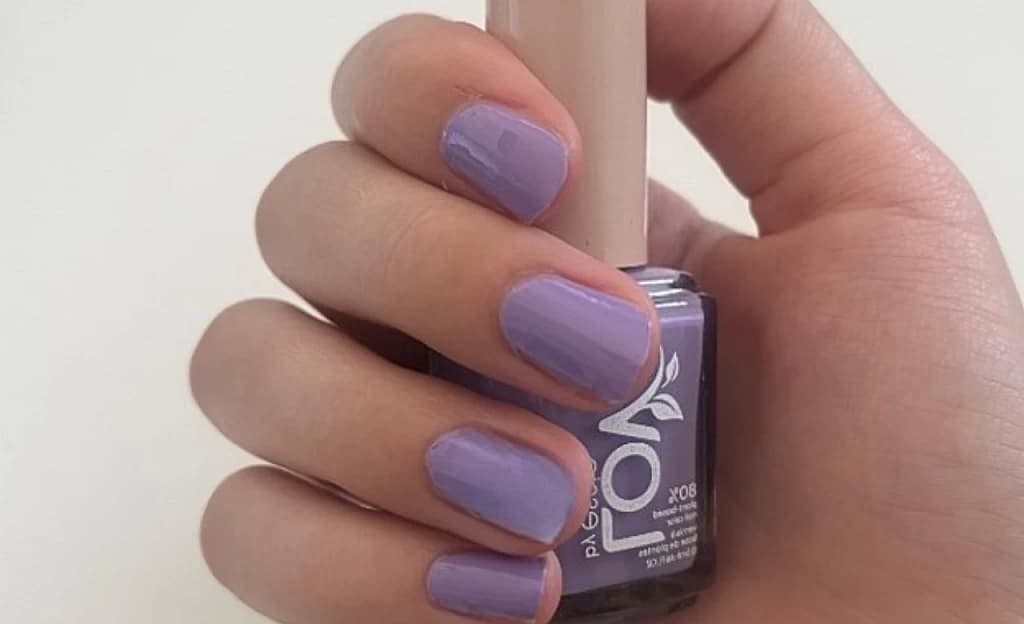
Step 6: Nail polish
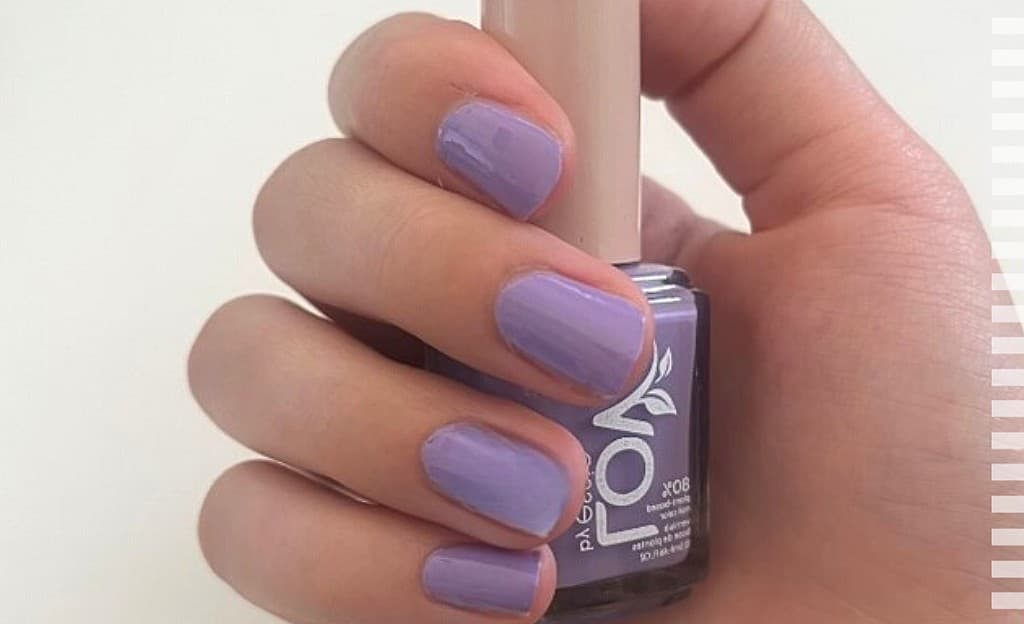
Here I chose the Love by essie line, because it consists of 80% plant-based ingredients. In addition, they convince with a wide variety of colours - from delicate pastel shades to bright eye-catchers. If you want a simple yet colourful nail design, the pastel colours are the perfect choice. These soft, subtle shades give your nails a fresh and playful look.
Step 7: Designs
Looking for an elegant yet playful nail design idea? Then you should definitely try the nude undertone in combination with colourful patterns and diverse floral motifs. This look will give your nails an appealing effect. Start with a foundation in a warm nude shade that matches your skin tone. This neutral base creates a soft and classic foundation for the design. After the base coat has dried, you can start with the coloured patterns.
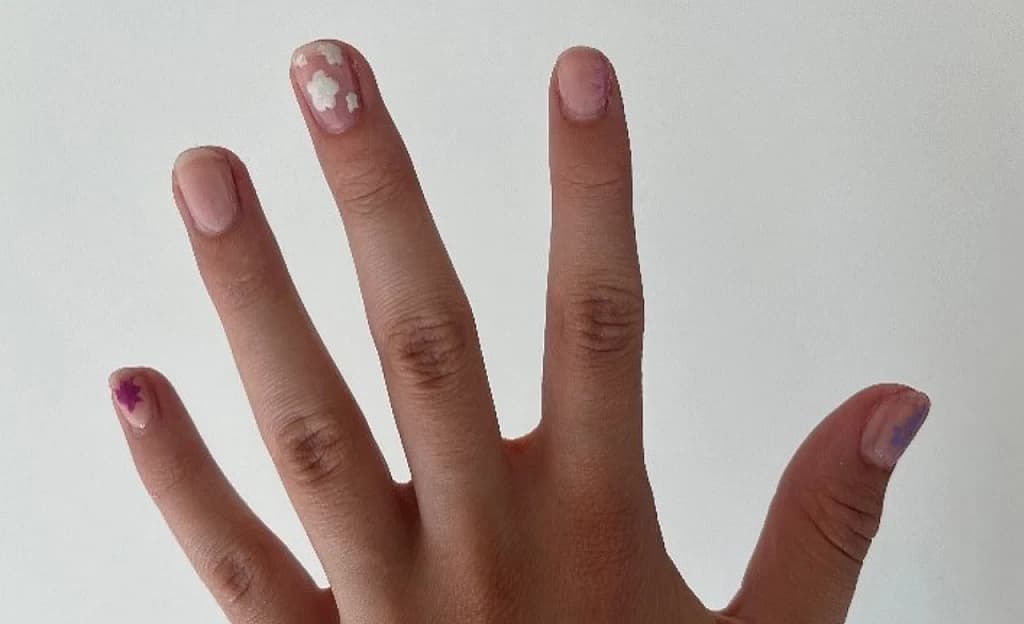
Let your creativity run wild and choose eye-catching colours like coral, pastel green or light pink for the patterns. You could paint diagonal lines, dots, stripes or geometric shapes on the nails. I used a thin brush to create the designs. If you don't have one, you can use toothpicks, old make-up brushes or paint brushes.
If you prefer a minimalist design, you can opt for simple accents. For example, paint a small heart or dot on one nail in a contrasting pastel colour.
Step 8: Clean edges
Small mistakes can happen when painting, but they are not that bad. If you have painted over your cuticles in some places, you can easily remove them with nail polish remover and a brush or cotton bud.
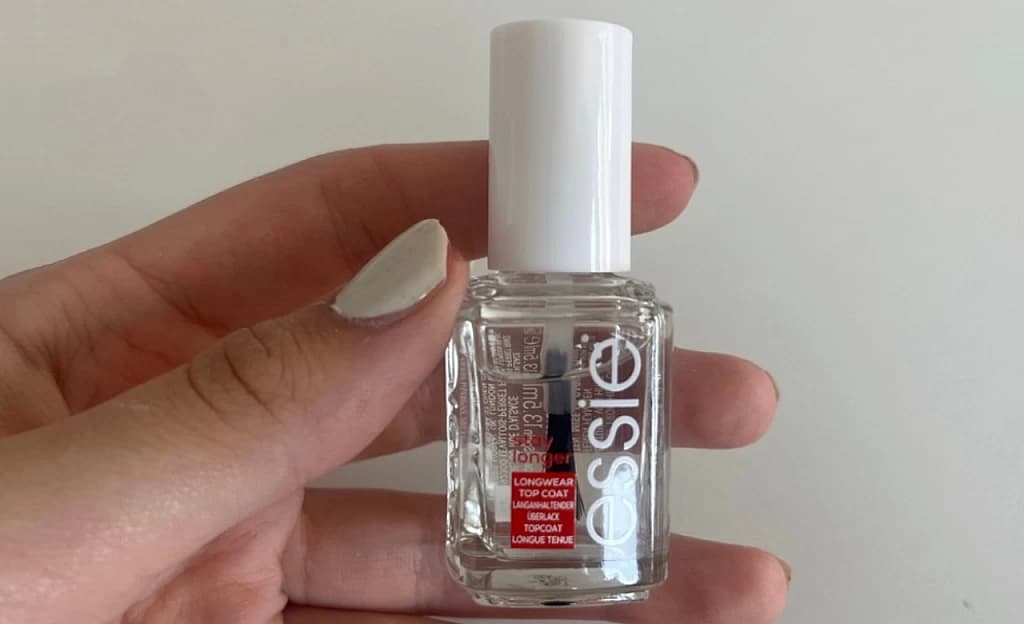
Step 9: Top Coat
Once your colour polish is completely dry, you can seal your design with a top coat. This way you can enjoy a longer lasting manicure, add extra shine to your design and give the essie nail polish a gel look.
Step 10: Nail oil
Finish your manicure with a nail oil. This will nourish your nails and cuticles and restore moisture after the stress of painting. Nail serums with nourishing oils and vitamins moisturise and improve the appearance of nails and cuticles.
Find your perfect colour
Now you know the simple steps you can take to create the perfect summer manicure. Want to find the perfect products for your individual manicure? Then discover all essie nail polish colours here:
Our recommendation
Similar products


No reviews available


